
Authentication
You'll need to authenticate your requests to access any of the endpoints in the K-LINK API. In this guide, we'll look at how authentication works. K-LINK allows you to quickly authenticate your API requests using Personal Access Tokens (Bearer Tokens) scoped directly to your specific tenant.
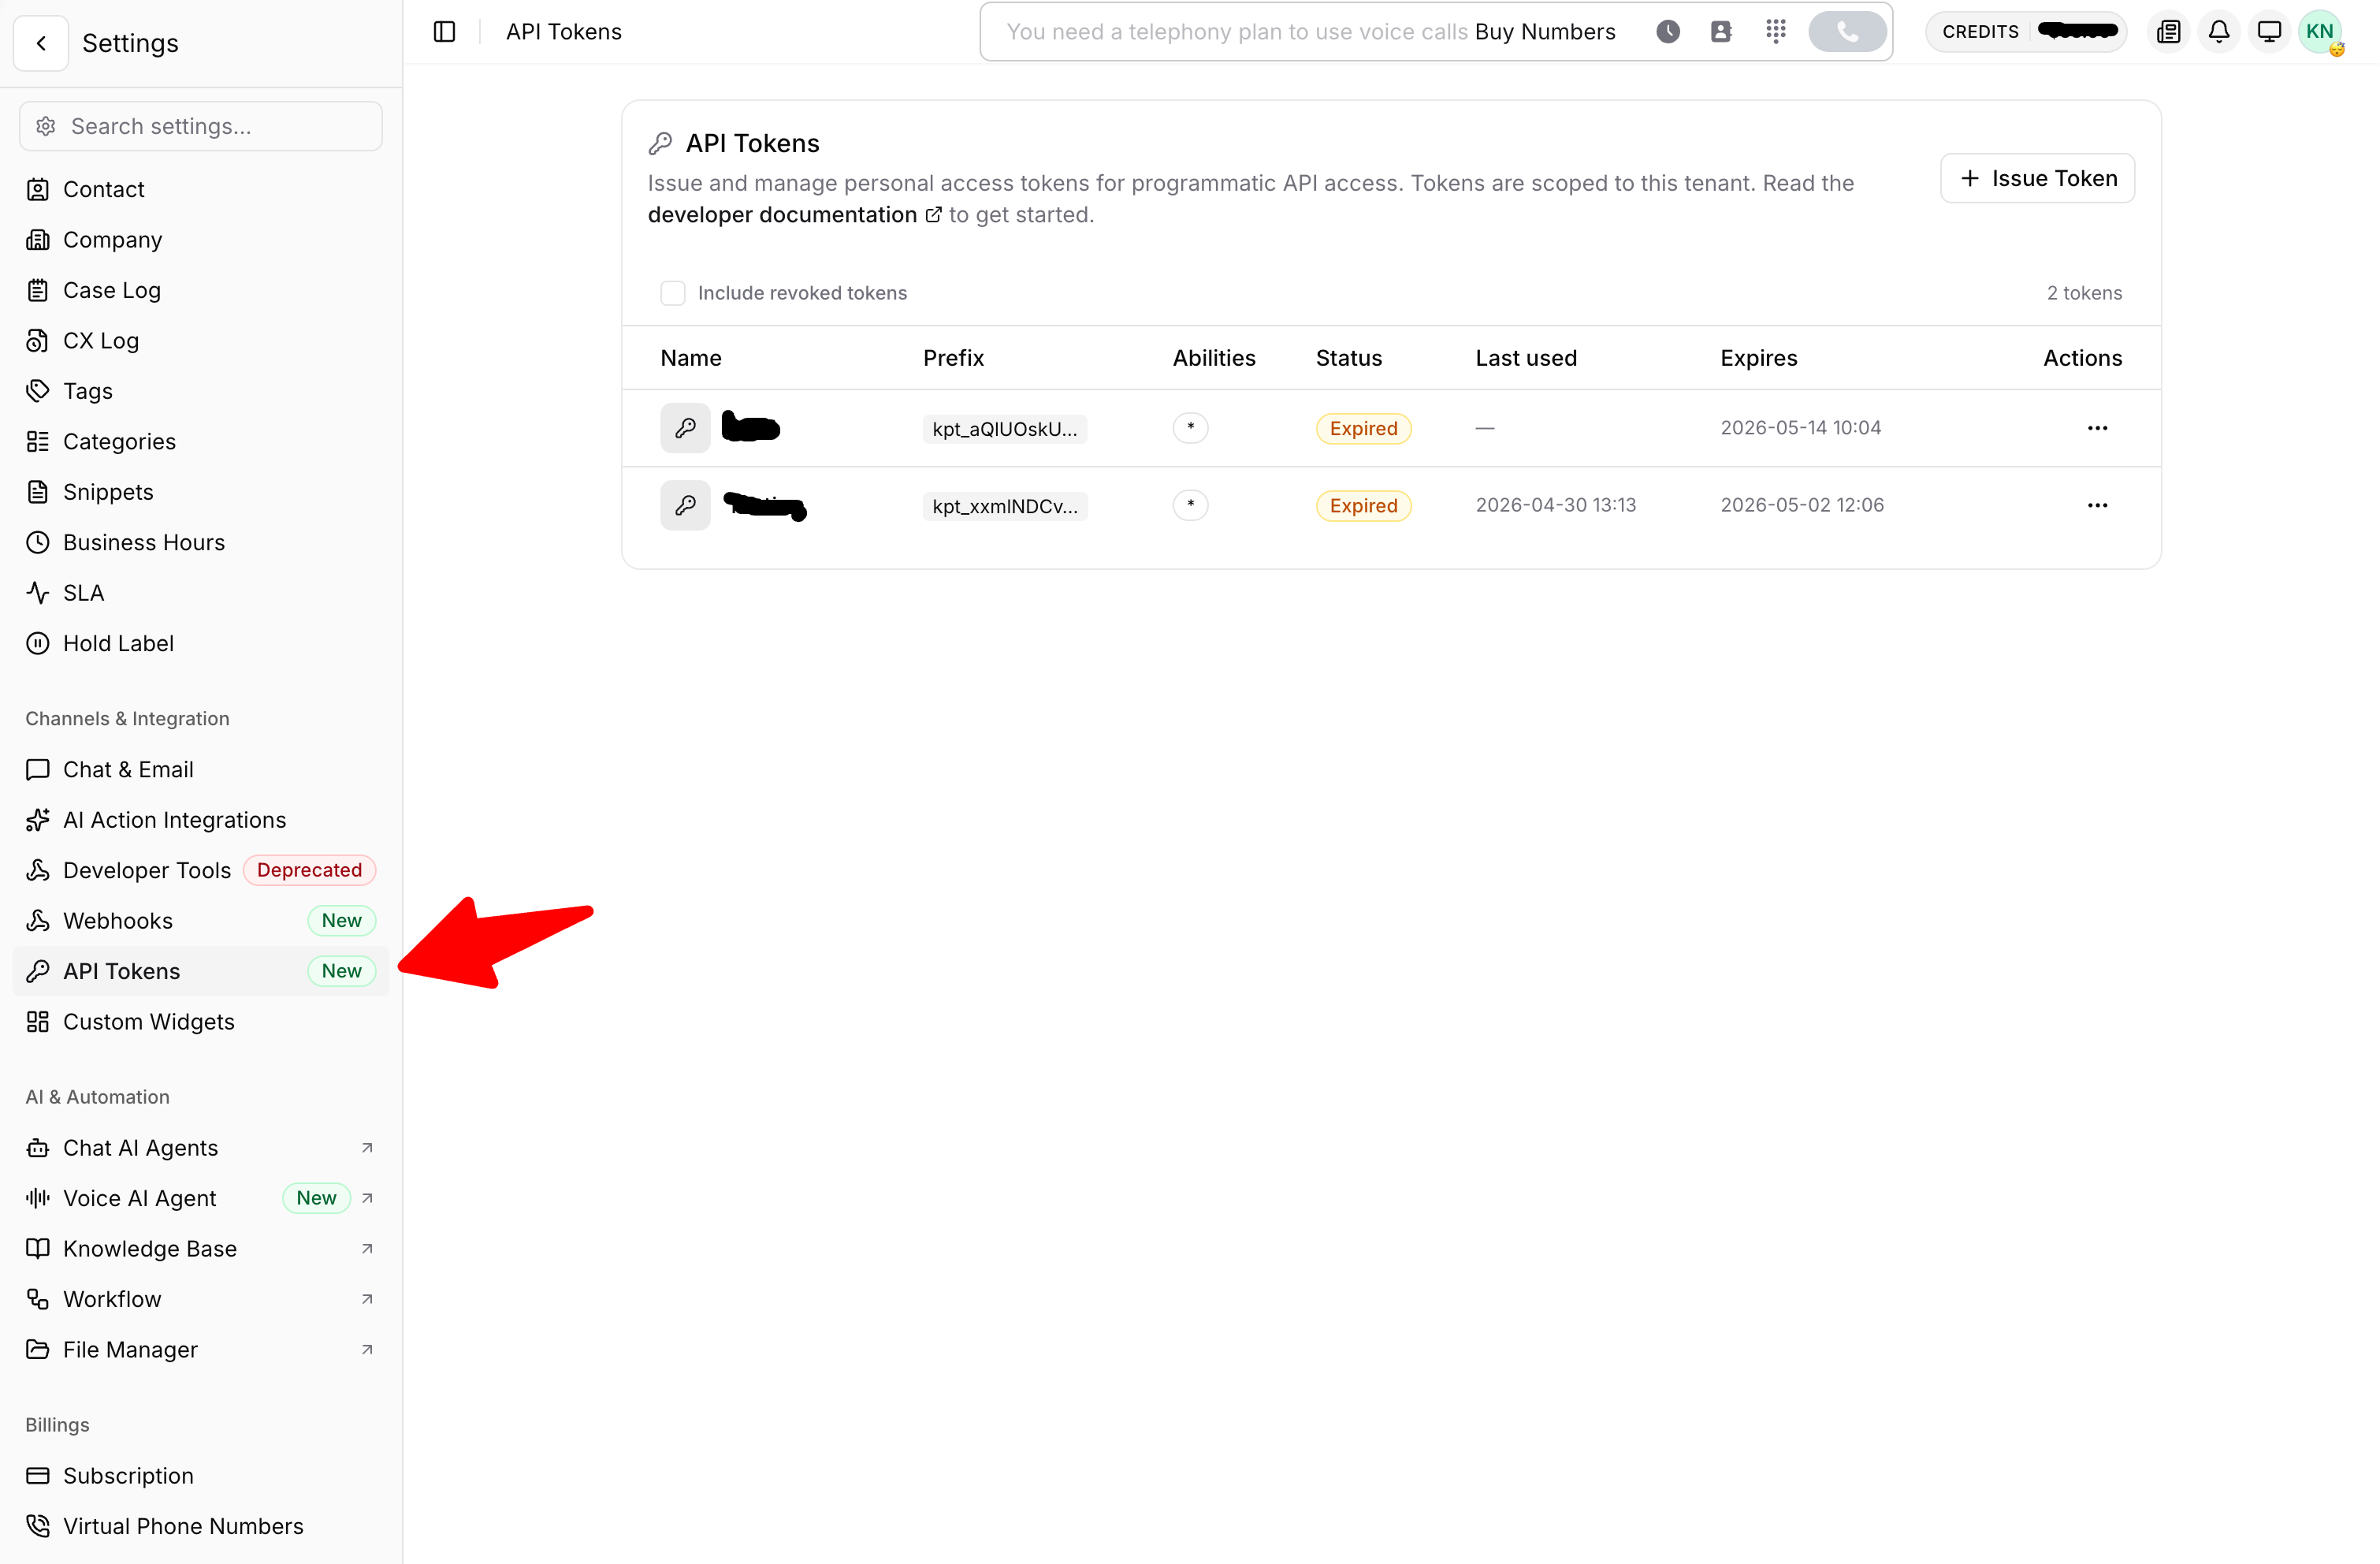
Step 1: Navigate to API Tokens
- Open your K-LINK dashboard.
- Scroll down the left sidebar menu to the Settings → Channels & Integration section.
- Click on API Tokens.
Step 2: Issue a New Token
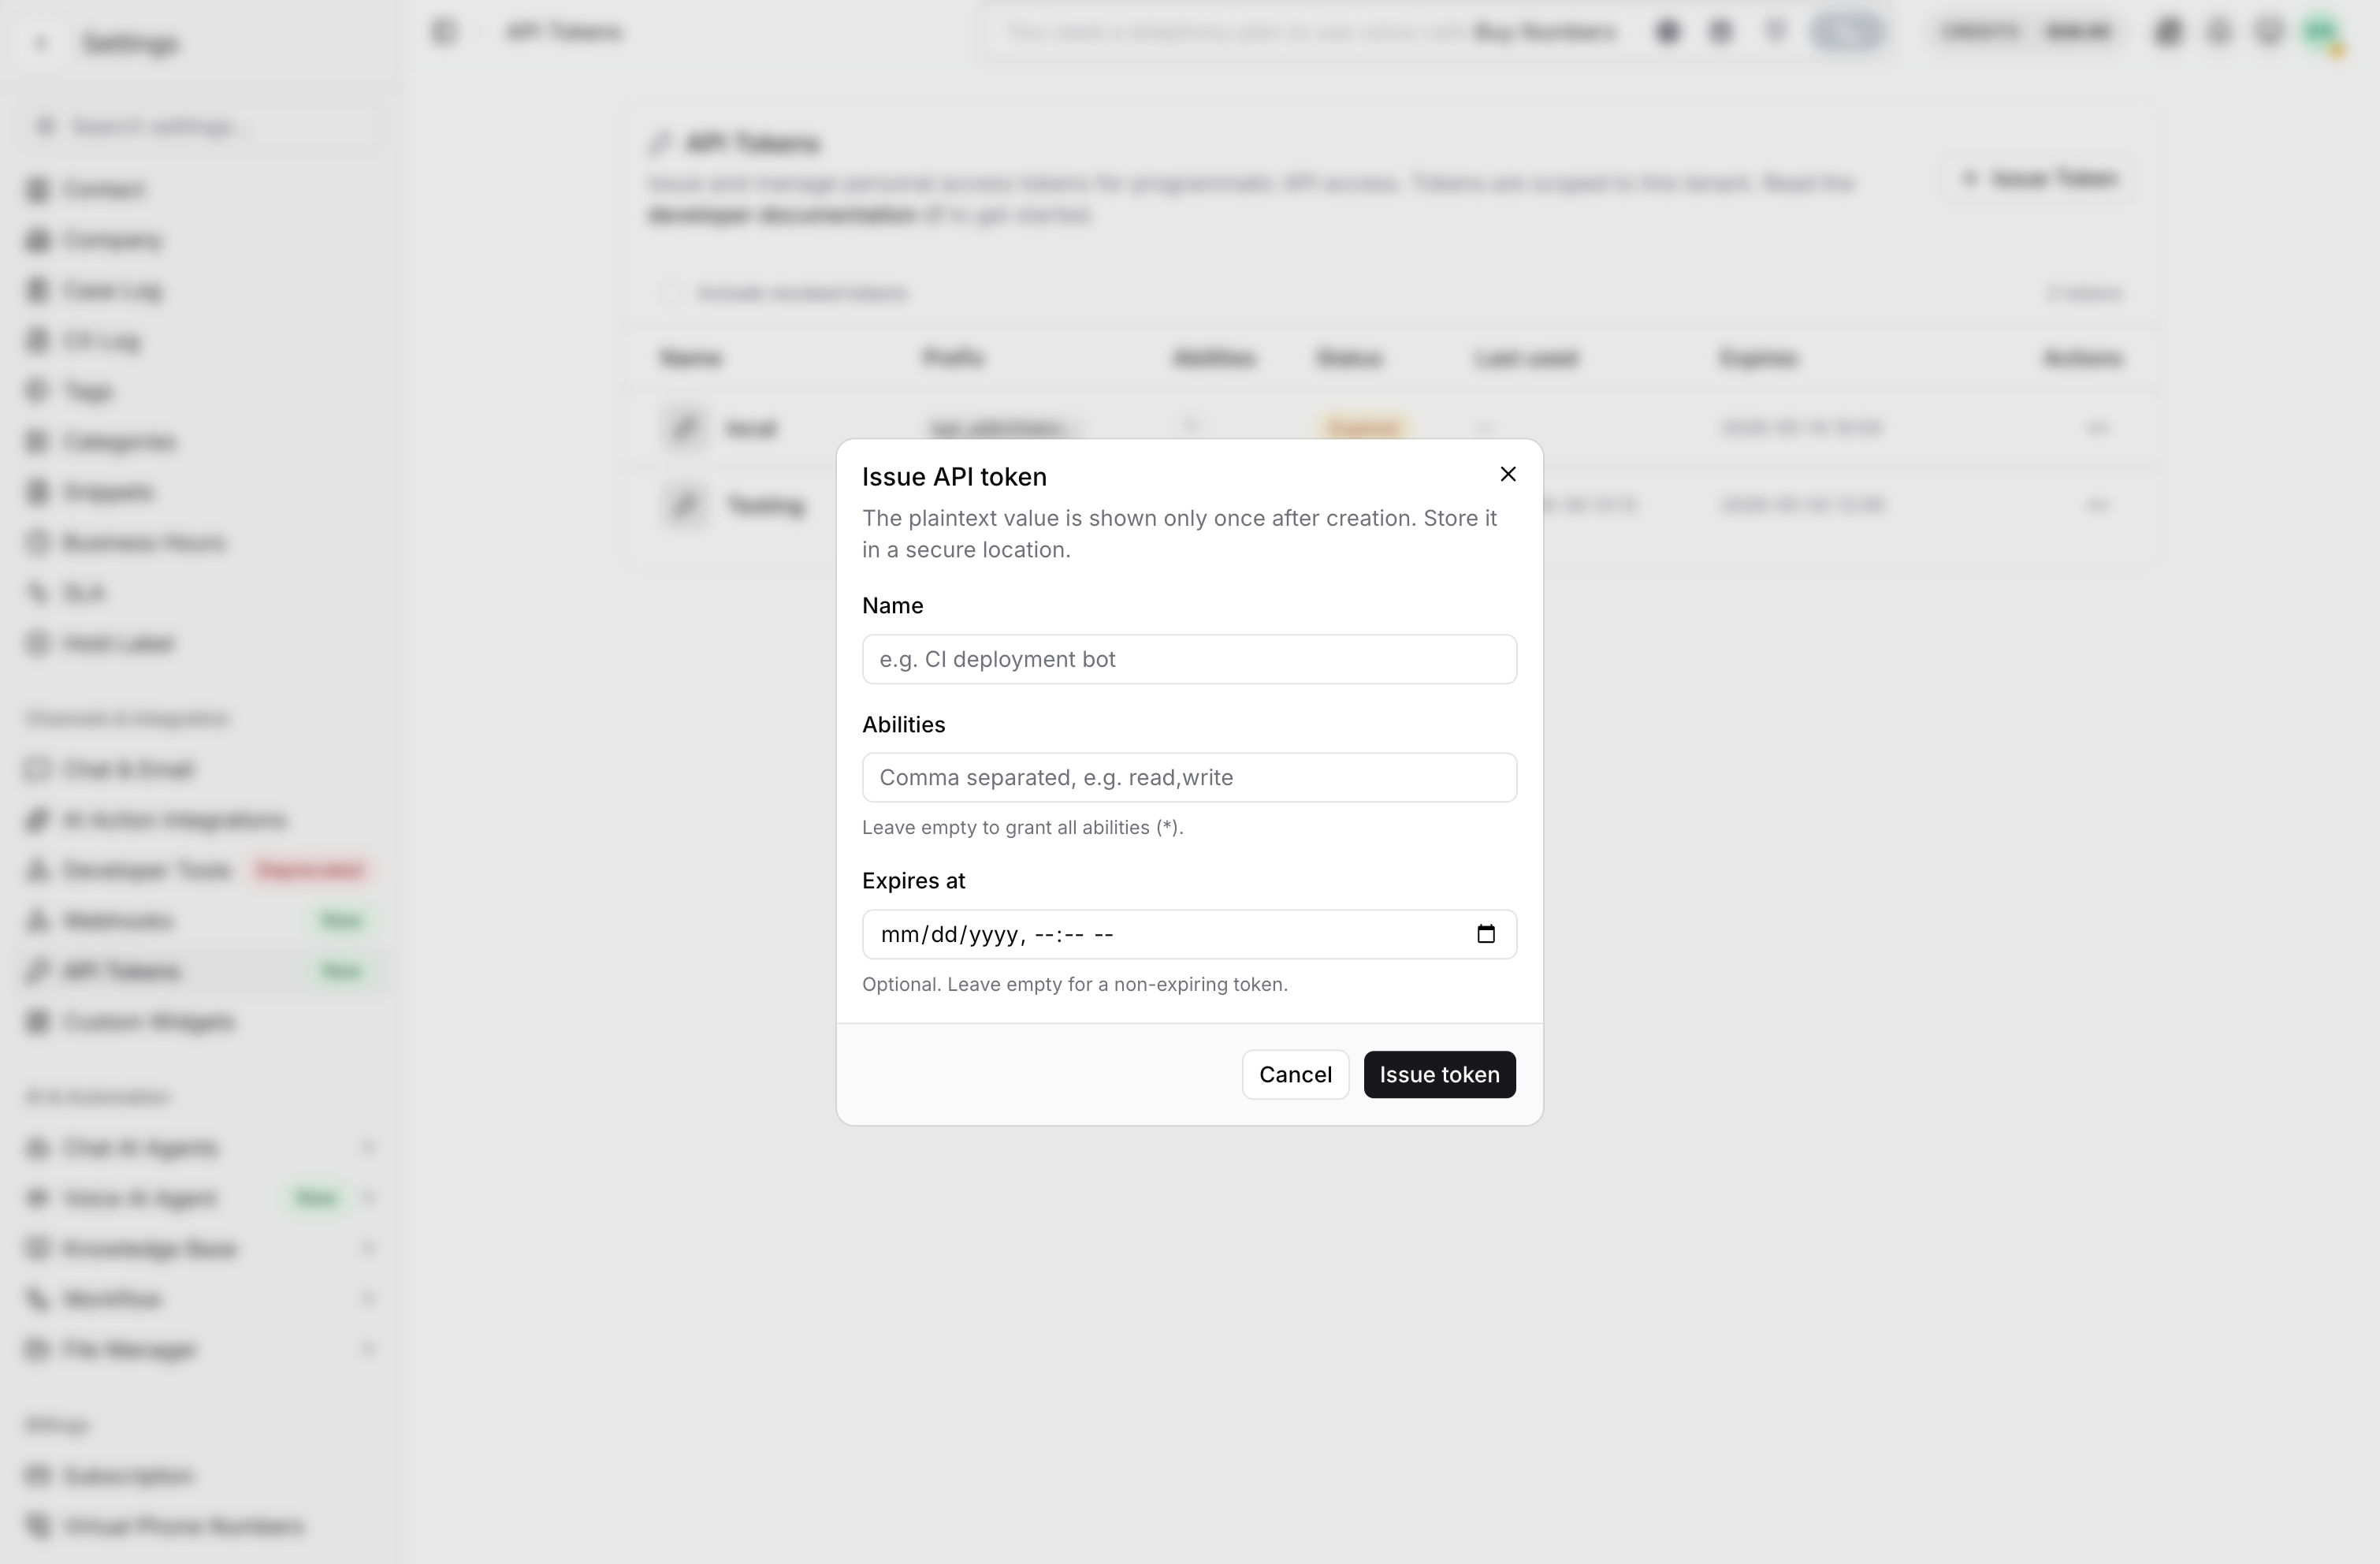
- On the API Tokens management page, click the + Issue Token button in the top right corner.
- Enter a descriptive Name for your token (e.g., Local Testing or Production Integration) so you can easily track its purpose.
- Select the required Abilities (scopes/permissions) your token will need.
- Set an Expiration date according to your security requirements.
Step 3: Copy and Secure Your Token
Important: Your full token will only be displayed once upon successful creation. Copy it immediately and store it in a secure location (such as a password manager or environment variable). You will not be able to retrieve or view it again after closing the window.
Authenticating requests
Once you have generated your personal access token, you must include it in the Authorization header of your HTTP requests as a Bearer token. Here is how to add the token to your request header using cURL:
Example request with bearer token
curl https://apigw.klinkcx.com/api/v1/contacts \
  -H "Authorization: Bearer YOUR_PERSONAL_ACCESS_TOKEN"
Always keep your token safe and reset it if you suspect it has been compromised.
Managing your tokens
From the API Tokens dashboard, you can monitor and manage your credentials at a glance:
- Track Usage: View the exact timestamp of when a token was last used.
- Check Status: Easily see if a token is Active, Expired, or Revoked.
- Revoke Tokens: If a token is no longer needed or if you suspect it has been compromised, click the three dots (...) under the Actions column and select Revoke to immediately invalidate it.
Always ensure that your personal access tokens are kept secure. Never hardcode them into client-side code, public repositories, or shared documents. Reset or revoke them immediately if you suspect they have been compromised.